Page Buttons

Showing posts with label purse string block. Show all posts

Wednesday, August 31, 2016

Serenity and NTT

Happy Needle and Thread Thursday, y'all!  I am happy to report that my latest quilt was finished, and shipped to its new home yesterday, but not before I got a couple of quick photos.


I'm calling this quilt Serenity, with the hope that it brings its recipients just that.  I had just enough leftover fabric to use on the backing, and I used the darkest greige for the binding.  I love the shade of the binding fabric, and I really wish I had gotten a closeup of it for you before shipping it off.  It is the perfect blend of gray and taupe, and it frames the softer colors so well.


I know that the recipients of this quilt are dealing with a lot right now, having lost everything in the flood, but I hope this quilt brings a little ray of sunshine to them, and much needed Serenity.

So, let's check out a few of my favorites from last week's party, shall we?  Tracy at From One Twenty Seven linked up these three pretties!


Michelle at From Bolt to Beauty linked up this sweet baby quilt finish.


and just look at this cute tote by Celine at Esprit Patch!  Love the selvages!  I keep saying that one day I'm going to make a bag.


Alright then.  Let's party, friends!

1.  You can link finished projects or WIP's , but just keep it about quilting and sewing!
2. Link to your specific post (not to your home page!) to make it easier for others.
3. Please remember to spread the word and post my button or a text link.  
4. Spread the comment love far and wide!
5. Following me is not a requirement to link, but is so very appreciated!

*If you're new to the party, here's a helpful tip for linking up- select "Auto Crop"  when selecting your thumbnail photo.  For some reason, trying to crop your own image results in the dreaded "white question mark box," and we definitely want to see your awesome work!  :)


Monday, August 29, 2016

Sewing Comfort

In its earliest days, quilting was an art form born of necessity.  Today though, I would venture to say that there are very few quilters that make quilts from salvaged fabric, for the primary purpose of warmth.  There is no doubt that quilting takes me on a never-ending journey of creativity that is rewarding and fulfilling.  I find such joy in seeing my vision take shape right before my eyes.  Though the primary purpose and methods of quilting have changed over time, one thing remains steadfast.  Quilts can be a great expression of love, whether given in celebration, or to bring comfort to those who are hurting.


This quilt is going to friends of my cousin who lost everything in the recent Louisiana floods.  The wife had a stroke a few years ago, and is wheelchair bound, and they had over five feet of water in their home.  When my cousin told me their story, and asked for a quilt to bring them a smile, I put everything else on hold to get it done.

My cousin specifically wanted soft, soothing colors with a spa-like feel, but with small pops of sunshine yellow.  She also mentioned that she loved my Sunny Skies quilt, which was made with my Purse Strings block tutorial.

This quilt will be finished before the day is out, and I am planning to ship it out tomorrow morning.    I wish I could wrap a quilt around every single person I know that is experiencing loss and hurt in my hometown right now, but I know that's impossible.  I just hope that this quilt can offer some measure of comfort for this particular family.


Friday, April 3, 2015

Sunny Skies

The name of this quilt is a bit of wishful thinking.  It was finished and photographed in a mad rush, trying to beat the thunderstorms that are heading our way, which will inevitably make the ground soggy and unsuitable for photos for days.  I did get sprinkled with a few raindrops, and had to get my shots as efficiently as possible between gusts of wind, but that's just all part of the beauty of spring!


I really enjoyed working with the calm, soothing color palette of this quilt.  It feels so light and airy to me, and perfect for the season.


I used all of the scraps in the backing, and used an aqua pin dot fabric to finish it out.  You can see the fabric really well in the photo of the quilt label.  I like the way both the yellow and navy pop against it, and the way that the navy binding stands out as well.


Slowly but surely, everything is turning green again, just in time for Easter.  After such a long, icy winter, the warmer days and blooming trees are so inspiring, and everything feels light and hopeful.  Happy Easter weekend, y'all!


Sunday, March 29, 2015

Glorious

Happy Sunday, y'all! My wild thing sang a duet in church this morning, and since then, we have just been enjoying family time and the glorious spring weather.  I got all of the blocks for my latest quilt finished last night, and took a few minutes this afternoon to put the top together though.


I am just loving the colors in this quilt.  The bright, fresh colors of a beautiful sunny sky have been really fun to work with.  I made the quilt using my Purse Strings Block Tutorial, and it went together pretty quickly.  The blocks finish at 15 inches, so that helps things go fast.

Spring is one of my favorite times of the year, and I hope you're enjoying some family time, and some gorgeous weather as well!


Saturday, November 9, 2013

Holiday Table Runner Tutorial

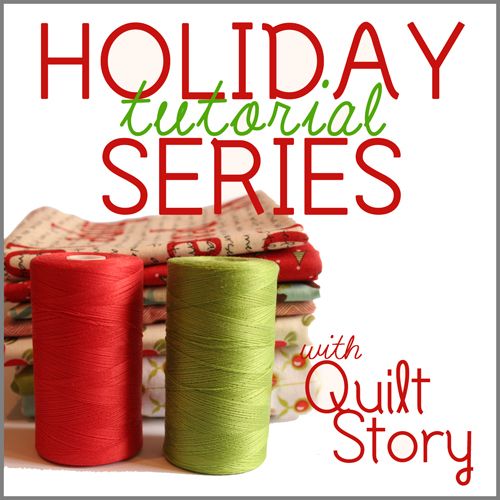
Hey y'all!  When Heather and Megan at Quilt Story asked me to participate in their holiday tutorial series, I was thrilled.  I'm excited to share a tutorial for a table runner using my purse strings quilt blocks.  It posted yesterday on Quilt Story, but I wanted to share it with you here today in case you missed it!


Fresh Poppy Design

If you're anything like me, you're in mad Christmas gift-making mode right about now.  It's only a little over six weeks away, you know...scary!  Anyway, if you're in need of a quick gift, or a fast way to dress up a table for a holiday dinner party, keep reading!

The table runner will be made with four blocks, and will measure 15 inches wide by 60 inches in length.  So, it's nice and long!

For each block, you'll need three contrasting fabrics, plus a solid:

*center fabric- one 5.5 inch square- this would be a great place for a fussy cut!
*purse flaps (blocks that surround the center)- four 5.5 inch squares
*purse strings (corner blocks)- four 5.5 inch squares
*16 solid squares- 3.5 inches

To make the purse flaps that surround the center square, take one 5.5 inch square and line up a solid square.  You'll be sewing corner to corner.  To keep your stitch line straight, many people recommend drawing a diagonal line across the back of your square as a guide.  I really hate this step, so as a little trick, I use a piece of painter's tape aligned with my needle on my machine and table.


By the way, if you have a fabric with a radiating pattern, this is a great place to use it.  Just be sure to sew your solid squares to the top.  Sew corner to corner and trim off the excess like this-


Give it a press, and sew another square to the adjoining side.


Trim the other side as well, and give it a quick press.  You'll need four of these for each block.  Don't worry about the fact that your point does not go all the way to the edge of the block like a flying geese block.  That's by design.  When the blocks are put together, this will create some awesome negative space!


To make the purse strings that are on the corners of the blocks, just use the same corner to corner sewing method, but instead of sewing to two adjoining sides, sew the solids to the opposite corners.  This block is commonly called the Road to Tennessee block.


Then just trim and press!


After you've made four of these, it's time to put the block together!  Just sew the units together just like a nine patch!


This is a 15 inch block, and I've sewn four of them end to end for my 60 inch table runner.  If you would rather a shorter one, just make three blocks instead!  (by the way, table runners are hard to photograph with their long, skinny shape)


You could also make a 30 inch table topper with your four blocks by putting them together like this.  See what I mean about that negative space?  I love the "kissing squares" shape created when the blocks are put together!


Then just baste, quilt and bind using your favorite method!  To see a whole quilt made with this block, check out Grapefruit Fizz

Feel free to play around with the block size and make it your own.  If you would rather make your blocks smaller than 15 inches, here's a little chart to help you modify the block size-


I hope you've enjoyed the tutorial, and wish you a wonderful holiday season!  Be sure to check out Quilt Story in the next couple of weeks for the rest of the Holiday Tutorial Series lineup!

Wednesday 11/20 Jennie & Clara from Clover and Violet  http://www.cloverandviolet.com/
Wednesday 12/4 Bev from Flamingo Toes http://www.flamingotoes.com/
Wednesday 12/11 Christa from Christa Quilts http://christaquiltsblog.com/
Friday 12/13 Erin from Why Not Sew? http://whynotsew.blogspot.com/


Sunday, September 22, 2013

Grapefruit Fizz

A little bit sweet and a little bit tart with shades of pink and orange together, this quilt is called Grapefruit Fizz and I just love the way it turned out!

I think the purse strings blocks create such an interesting pattern and secondary pattern when they're all put together, and I definitely see more of these in my future!  


Y'all know me, if there's a polkadot to be had, I will back a quilt with it!  It just so happens that this particular fabric, from the Amy Butler Lotus line goes just perfectly.  How could I resist?


For my newer readers, I made my label using my own method, which you can find HERE.  For the binding, I opted for one of the fabrics already in the quilt.  It's called Boho Stripe from the Wrenly fabric collection.


I have to say that of all of the quilts I've made, this one is definitely near the top in terms of pride in my accomplishment.  This is the only quilt I've ever taken from a sketch to a reality, with a completely original block design.  I really enjoyed that side of the creative process, and it's something I think I'll do again in the future!


Thursday, September 19, 2013

Purse Strings Quilt Top

It's late, so this post will be short and sweet-  I got my purse strings quilt top finished just under the wire to join in all of the Friday finish parties.  woo hoo!


It's getting close to midnight and I just finished putting this top together, and I just couldn't bear to wait until daylight to take a good picture.  I really love this pattern!  The design is so cool when all of the blocks are put together.

Can't wait to sew up all of the scraps for the backing and go on a hunt for the perfect backing and binding fabrics!  Happy almost weekend!


Wednesday, September 18, 2013

Needle and Thread Thursday!

Welcome to another Thursday, y'all!  I'm feeling pretty excited this week, because I'm working on blocks that are lots of fun to make with fabrics that I just adore.  Remember this little bundle?


Well, I'm working away on turning those into these Purse Strings blocks.  I only have ten done so far, but I have an evening of sewing time ahead and hope to have the top finished up before the weekend.


If you missed my tutorial for these blocks, you can find it HERE!  I finished another project using these blocks (just a little one), but I can't share it with you for awhile.  I'm horrible at secret-keeping and knew that I wanted to share the block, even if I couldn't share that particular project, which is why I immediately poured myself into making a project that I could write about!

Without further ado, take a look at some of the fabulousness that was linked up last Thursday!

**As a courtesy to these bloggers, if you want to pin the images I'm featuring, please use the links and pin from the original source.  Thanks a bunch!

Cynthia shared this beautiful Star Surround quilt, and I love the shades of purple!


I love postage stamp quilts, and Adrienne @ Chezzetcook Quilts shared her progress on this beauty!


And Snips Snippets shared this fantastic Star Dresden pillow!


I can't wait to see what's going on this week!

Here are the party rules.  You know the drill!

1.  You can link finished projects or WIP's , but just keep it about quilting and sewing!
2. Link to your specific post to make it easier for others.
3. Spread the word and post my button or a text link.  Please find my new button on my sidebar!
4. Spread the comment love far and wide!
5. Following me is not a requirement to link, but is so very appreciated!


**And once again, as a courtesy to these bloggers, if you want to pin one of the fabulous projects linked, please click on the thumbnail to go to the original source and pin from there!  Thanks!


09 10 11 12
Blogging tips