I've decided to call this block "Purse Strings" since it looks like the top view of a drawstring bag, and the more blocks I put together, the more I love them! (Other great names were suggested, but several of those were already assigned to other blocks) If you read my blog often, you know that I like quilts/blocks that are fairly easy to piece, and yet make a big impact. This block gets a check mark in my book for both of those qualities!
The other great thing about this block is its size. This is a 15 inch block! So, a 4x4 block quilt would make a generous throw size, and a 3x3 block quilt would be perfect as a baby quilt. Bigger blocks = less teeny tiny pieces, and I'm all about that! If you would rather a smaller block, here are the measurements for that as well-
To make a purse strings block, cut four 5.5 inch squares to make the "purse flaps," four 5.5 inch squares to make the "strings," and one 5.5 inch square for the center of the block, or the "inside of the purse." This center square would be a great place to use fussy cuts! You will also need sixteen 3.5 inch squares of your background fabric (or, corner squares).
I am using only three fabrics (plus white), but this would also be really cute as a scrappy block!
First, we'll make the four "purse flaps." These surround the center square, so if you have a stripe, chevron, or other design that would look cute in a radiating pattern, go for it!
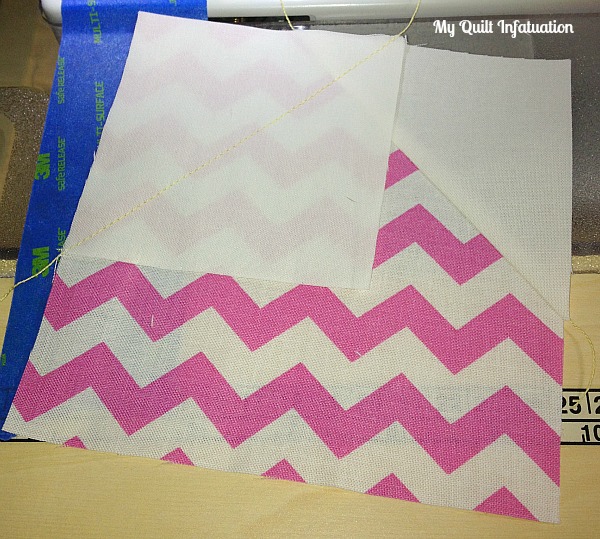
To make these pieces, we need to line up one white square on the corner of your printed fabric and sew corner to corner. Like this-
To keep your stitch line straight, many people recommend drawing a diagonal line across the back of your square as a guide. I really hate this step, so as a little trick, I use a piece of painter's tape aligned with my needle on my machine and table.
You can keep the corners in line with the edge of the tape, and know that you're sewing a straight line! After sewing, take your scissors and trim away the excess, leaving 1/4 inch seam allowance. It doesn't have to be too perfect!
Give it a quick press, then line up another white square with an adjoining corner. Sew corner to corner in exactly the same way!
Trim away the excess, and press again!
Repeat these steps for all four "purse flap" pieces. I promise, once you get the hang of it, it goes really quickly, and the end result is worth it!
The points on these don't go all the way to the edge of the block (unlike flying geese), and that's by design. When the blocks are all put together, it creates a great shape in the negative space!
Now, we'll use the same technique to create the "drawstring" parts of the block, better known as a Road to Tennessee block. These are a little bit quicker because you won't have to press until the end. Start by lining up a white square on top of your printed fabric and again, sewing corner to corner and trimming the excess. Don't worry about pressing this just yet!
This time, our second white square will be sewn to the opposite corner, rather than an adjoining corner. Sew the second piece and trim. Your piece should look like this.
Now we're ready to press! Be careful not to drag the iron too much or you'll distort your corners!
Repeat for all four "drawstring" pieces!
After all of that, the rest is really a snap! Lay out your blocks like this- Do you see the purse and strings shape?
Sew them together as you would a plain old nine patch. Give your block a final press, and voila! A beautiful Purse Strings block!
Of course, the real beauty of these blocks happens when they're all put together! Lots of quilt blocks are like that. I love the little figure-eight shape created between these. I can see lots of opportunities for some creative quilting in these little negative spaces!
Edited 9/21- Here is what the blocks look like all together in the finished quilt! You can find additional pictures of the finished quilt
HERE!


